Podcast on How to Make a Cascade Bouquet with Greenery
Sit back, relax and enjoy our podcast on how to make a cascade bouquet. Due to the lockdown restrictions, we are unable to reach the studio and film our monthly episode for Bud Green, so we have had to improvise and discuss the different styles instead of a visual explanation. You can find the step-by-step written below along with a photograph of the example bouquet.
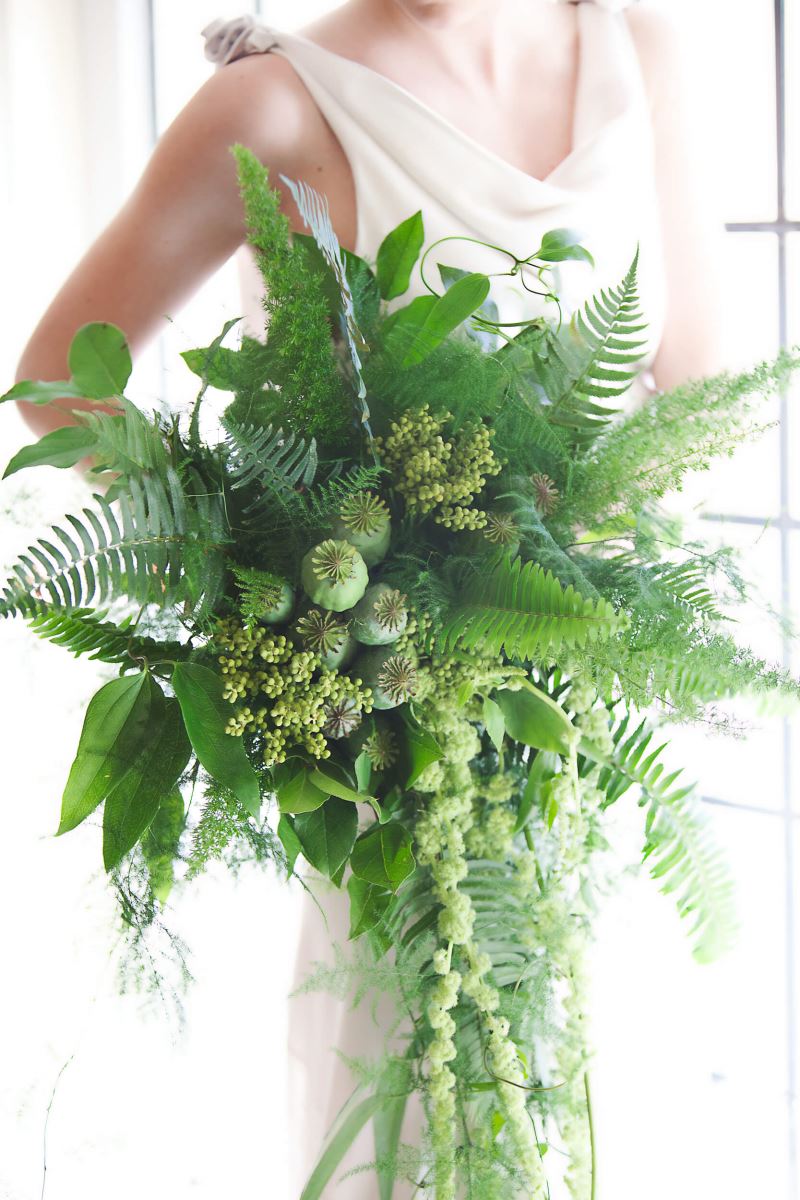
Bouquet discussed will resemble this style of bouquet using similar types of greenery / plant materials:

Top Tips
-
This design would be perfect for that Bride who loves green. It represents hope, nature, harmony and fertility! It is often associated with environmentally conscious weddings.
-
The recipe that we have chosen to use for this demonstration includes a beautiful mix of different textures and shapes to build depth and interest to the design, we have chosen an assortment of ferns, asparagus and sword, trailing amaranthus, papaver (poppy) heads, clematis kibo, hypericum berries and Philodendron leaves.
-
You will also require a floral foam bouquet holder, some stub wires (0.71 gauge) and of course, your trusty florist tool box!
-
To be more sustainable, eco-friendly, you can use a holly chapple egg, or even; not use a holder at all, depending on your level of experience and skill. However, if you are looking to choose this method, make sure you use longer stems, as additional stem length is required to “feed” through the frame. Longer, stronger stems are also easier to work with if you are using no frame at all. They offer more placement and design options. Do bear in mind though, if you use a frame, you can stop and start your design unlike a hand-tied style, which you can't put down.
-
First steps would be to condition all of the fresh products and to lay out all on your workbench in individual variety groups.
-
Lightly soak the wet foam bouquet holder and secure it to a bouquet stand so it's easy to work on. Make sure you have your scissors and wires close to hand.
-
Even if it is a freestyle bouquet, you still require structure, shape, definition and balance. I would say physical balance more so than visual balance. This will make the bouquet easy to carry. If the actual balance is wrong, the bouquet will naturally move to its heaviest point, which may affect the finished impression you were hoping for!
-
If we start with the beautiful trailing Amaranthus, cut it to the required length and wire with a double leg mount. Now, if you don’t know what a double leg mount is, it is simply a wire used to create a false stem aiding support and anchorage. Both ends of the wire should be equal once they have been wrapped around the base of the stem. I would recommend heading over to Youtube for a visual explanation. Then, push the wires through the base of the frame until they appear at the top. Simply bend the wire over the plastic part of the frame and secure.
-
Securing the foliage with wire stops it from falling out when the Bride is walking! You certainly don't want a trail of foliage following her down the aisle!! You could also use floral glue, either on its own instead of wire or in addition to the wire for added security or if using particularly long and heavy stems.
-
Moving on, you may decide that you would like more than one stem of Amaranthus in the tail, so add additional stems now. Once the amaranthus is secured, you can think about adding sword fern and Asparagus either side of the Amaranthus to reinforce the shape. Use arching stems to establish form and give the desired freestyle appearance.
-
The philodendron leaves can be used to give visual weight to the design. Add these close to the centre of the bouquet, both focally, and behind the placed foliage to help maintain a 3 dimensional feel to the design.
-
So next up we have the Poppy heads. I would suggest that some of the poppy Heads are placed at higher levels to other foliage which will achieve recession, and showcase other textures and shapes within the bouquet. You can then add hypericum to create depth and highlight the Poppy heads.
-
Next add the clematis kibo for interest and colour in the bouquet. Step back and look at the bouquet to see where you need to add.
-
Lay the bouquet on a decorated box lid with a hole cut, in which to place the handle. It can then be stored somewhere cool and dark and not below 4 C. Spray it with water.
-
Make up the day before would be fine if using flowers as well as foliage. If it is a foliage only bouquet, you could even get away with making it up a couple of days before.